Introduction
Vault is a tool developed by HashiCorp for managing secrets and sensitive data. It provides a secure and centralized platform for storing, accessing, and controlling access to passwords, API keys, certificates, and other confidential information.
The following text explains how to install Vault on Ubuntu using three different approaches.
Prerequisites
- Ubuntu system (this tutorial uses Ubuntu 22.04).
- A user account with sudo privileges
- Access to the terminal.
Install Vault on Ubuntu from the Official Git Repository
One way to install Vault is from the official Git repository. It contains the latest features, enhancements, and bug fixes that are not always available in the stable releases distributed through package managers. To get Vault via the Git repository, follow the steps in the sections below.
Step 1: Install and Configure Go
When installing Vault via the official Git repository, Go needs to be installed and properly configured.
Follow these steps:
1. Update system packages
sudo apt update
2. Install Go:
sudo apt install golang
3. Confirm the installation was successful:
go version
4. Set up environment variables by editing the ~/.bashrc file. Open the file in a text editor and add the following lines:
echo 'export GOPATH="$HOME/go"' >> ~/.bashrc
echo 'export PATH="$PATH:/usr/local/go/bin:$GOPATH/bin"' >> ~/.bashrc
5. Save and exit the file.
6. Refresh the shell by running:
source ~/.bashrcThe command has no output
7. Verify GOPATH is correctly set by running:
echo $GOPATH
The terminal returns the directory Go is installed in. GOPATH is an environment variable Go uses to specify the Go workspace root directory. The workspace contains the Go source code files, their compiled binaries, and other related files.
If the terminal returns an empty line, it means GOPATH is not set. Set it manually by adding the following line to the ~/.bashrc file:
export GOPATH="$HOME/go"
Save and exit the file and run source ~/.bashrc and echo $GOPATH again.
Step 2: Ensure Git is in the PATH
To verify Git is in the PATH, run the git --version command.
git --version
If Git is in the PATH, the terminal prints the version information. If git is not, the terminal returns an error message or shows no output.
Note: If Git is not installed, get Git on Ubuntu by running sudo apt install git.
If Git is installed but not in the PATH, add it by modifying the shell configuration file. Here's how to do it for the ~/.bashrc file:
1. Open the ~/.bashrc file in a text editor:
sudo vim ~/.bashrc2. Add this line at the end of the file:
export PATH="$PATH:[/path/to/git/directory]"In this case, [/path/to/git/directory] is /usr/bin/git. Therefore, the command is:
export PATH="$PATH:/usr/bin/git"
3. Save the file and exit.
4. Apply changes to the current shell session:
source ~/.bashrcThe command has no output.
5. Run the git --version command again.
The terminal prints the Git version output.
Step 3: Clone the Vault Repository
Cloning the Vault repository is essential as it allows users to obtain the Vault source code from the official GitHub repository. To do this, run the following command:
mkdir -p $GOPATH/src/github.com/hashicorp && cd $_<br>git clone https://github.com/hashicorp/vault.git<br>cd vault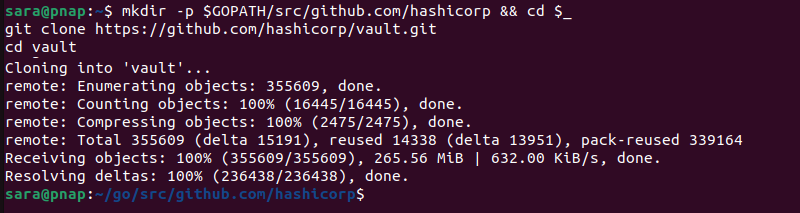
The command consists of the following:
mkdir -p. Creates necessary directories while $GOPATH presents an environment variable that points to the workspace directory.cd $_. Changes the current directory to the last argument of the previous command. This is the hashicorp directory created bymkdir.git clone https://github.com/hashicorp/vault.git. Clones a Git repository from the specified URL.cd vault. Navigates to the cloned repository.
Step 4: Bootstrap the Project
Bootstrapping includes fetching and compiling essential dependencies, libraries, and tools to construct the Vault binary. This ensures all prerequisites are set up correctly before moving forward with the build process.
Executing this step via the make bootstrap command guarantees the project is appropriately configured and ready for compilation. Run the following:
make bootstrap
Step 5: Build Vault
Compile Vault for your system with the make dev command. The command stores the compiled program in a directory called bin.
make dev
Step 6: Confirm Vault Installation
Run vault to verify the program is successfully installed on the system
vault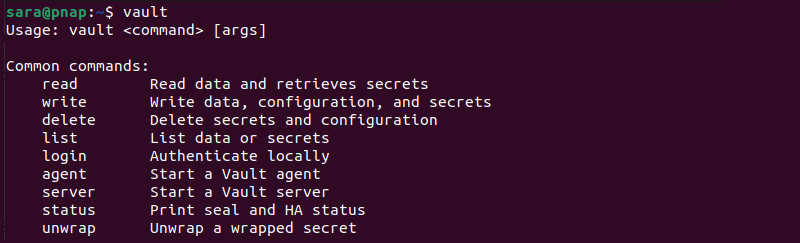
Install Vault on Ubuntu via Package Manager
Using a package manager to download and install Vault on Ubuntu offers a streamlined installation process. The process configures dependencies automatically and makes the installation process faster. The following text elaborates on installing Vault using the package manager.
Step 1: Update Local Package Index
Ensure the system's package manager is up-to-date by running the following command:
sudo apt update
Step 2: Install GPG
When installing Vault from a package manager, it's crucial to ensure the packages come from a trusted source. GPG helps by providing cryptographic signatures for packages to verify their authenticity.
If GPG is not already installed, install it using the following command:
sudo apt install gpg
Step 3: Download a Keyring
Download the HashiCorp keyring and save it as a GPG keyring file:
wget -O- https://apt.releases.hashicorp.com/gpg | sudo gpg --dearmor -o /usr/share/keyrings/hashicorp-archive-keyring.gpg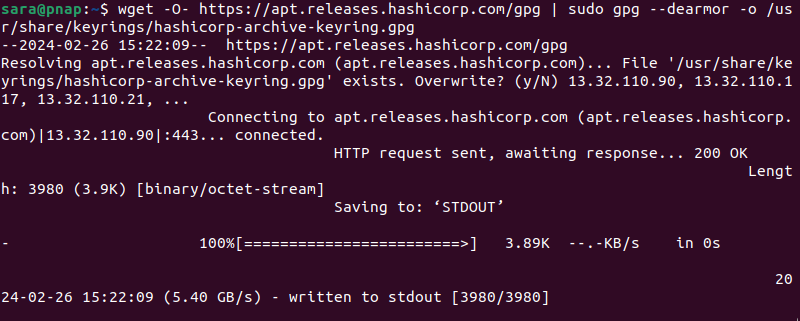
The command above does the following:
- Downloads a keyring file from HashiCorp's website using the
wgetcommand. - Converts this file into a format easier for the system to use for security purposes with
sudo gpg --dearmor -o. - Saves the converted keyring as a GPG keyring file named hashicorp-archive-keyring.gpg in the /usr/share/keyrings/ directory. Here, the package manager uses it to ensure the authenticity of HashiCorp's package during installation.
Step 4: Verify Keyring Authenticity
To confirm the downloaded keyring's authenticity, run the following:
gpg --no-default-keyring --keyring /usr/share/keyrings/hashicorp-archive-keyring.gpg --fingerprint
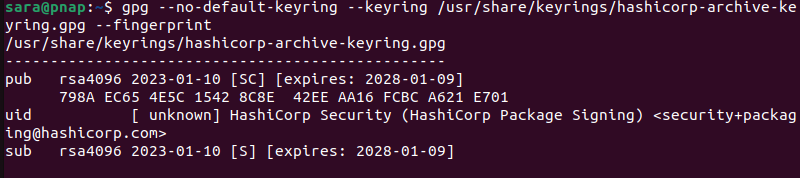
The command instructs GPG to examine the specified keyring file and display the fingerprint associated with its keys.
Step 5: Add the HashiCorp Repository to the System's Package Sources List
This following command adds the HashiCorp repository to the system's list of package sources:
echo "deb [arch=$(dpkg --print-architecture) signed by=/usr/share/keyrings/hashicorp-archive-keyring.gpg] https://apt.releases.hashicorp.com $(lsb_release -cs) main" | sudo tee /etc/apt/sources.list.d/hashicorp.listThe command contains the following:
echo. Prints text to the terminal."deb [arch=$(dpkg --print-architecture) signed by=/usr/share/keyrings/hashicorp-archive-keyring.gpg] https://apt.releases.hashicorp.com $(lsb_release -cs) main". Specifies the repository's configuration details.sudo tee /etc/apt/sources.list.d/hashicorp.list.Writes the echo command output to the file /etc/apt/sources.list.d/hashicorp.list. This ensures the package manager recognizes the HashiCorp repository as a valid source.
The command has no output.
Once completed, update the package manager once more with sudo apt update.
Step 6: Install Vault
Use the following command to install Vault:
sudo apt install vault
Following these steps ensures a smooth Vault installation on the Ubuntu system using the package manager. There is no need to configure Vault, unlike with the manual installation. Verify the installation is successful by executing:
vault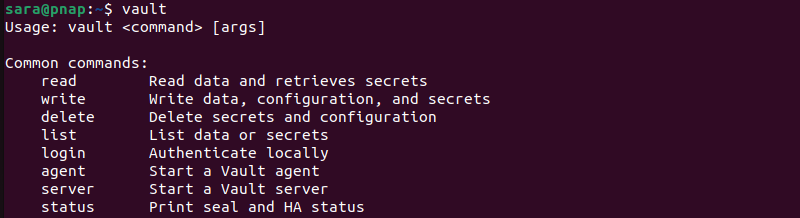
Install Vault on Ubuntu via Binary Installation
While more complex, the binary method for Vault installation on Ubuntu offers flexibility, control, and ease of upgrade compared to other methods. The following steps explain how to install Vault on Ubuntu via the binary installation process.
Step 1: Install Consul
Consul is a scalable service discovery and configuration system. It offers features like service registration, health checks, and a distributed key-value store. Consul integration allows Vault to securely manage dynamic secrets and ensures reliable communication between Vault servers and clients.
To install Consul on Ubuntu, take the following steps:
1. Navigate to the official Consul webpage and click the Download button.
The browser takes you to the Download page with all the available packages.
2. Search for the Linux section and the Binary download subsection.
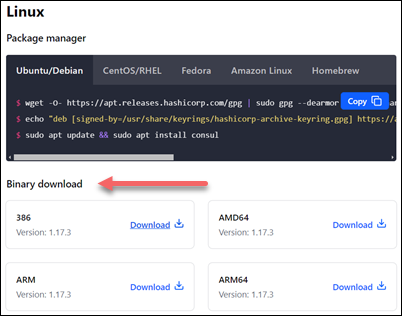
At the time of writing this article, the latest available version was 1.17.3. There are four available downloads for different system architectures.
3. Choose the download compatible with the system's architecture. In this example, it's AMD64.
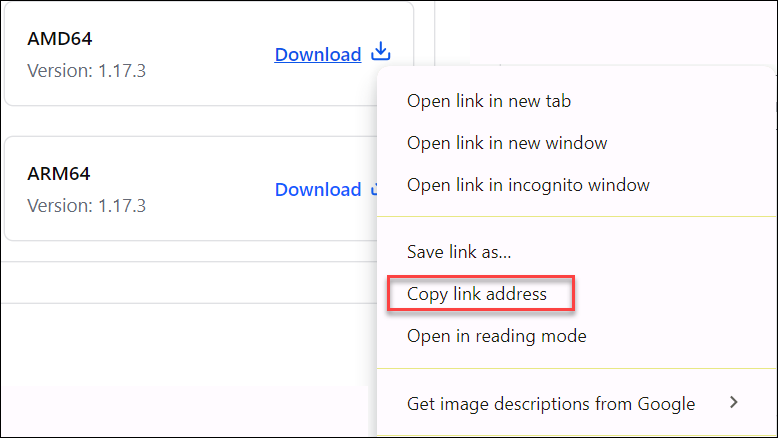
4. Right-click the Download button and copy the link location, as it is needed in the next step.
5. Open the terminal and use the wget command to download the Consul package:
wget [copied Consul URL]In this example, it is:
wget https://releases.hashicorp.com/consul/1.17.3/consul_1.17.3_linux_amd64.zip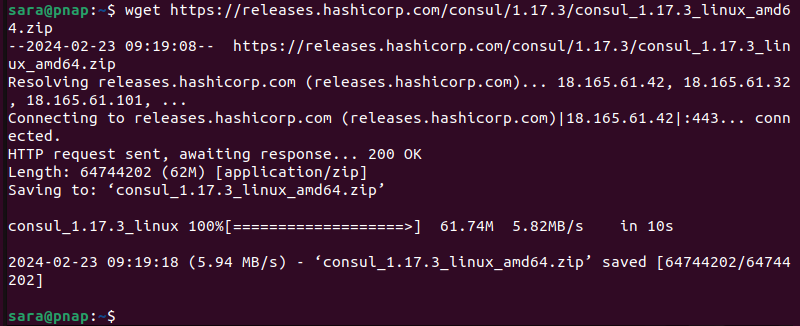
6. Unzip the package with the command:
unzip consul_1.17.3_linux_amd64.zip
The command varies depending on the version. Make sure to use the correct version in the command.
Note: To download unzip software, use the command sudo apt install unzip –y.
7. Move the installation package by typing the following command:
sudo mv consul /usr/binThe command has no output. However, it moves the Consul installation package to /usr/bin, which allows users to execute the Consul binary from any directory within the system without specifying its full path.
8. Verify the installation with the command:
consul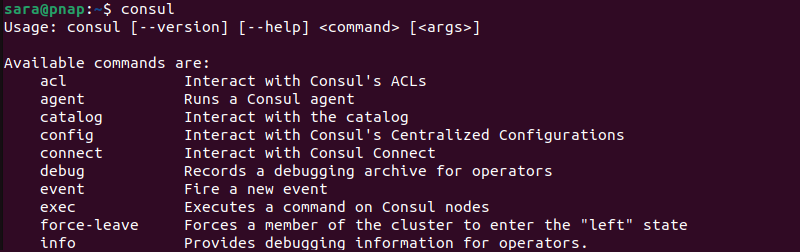
The output lists all available consul commands.
Step 2: Configure Consul
1. Create and open a new file with a text editor of choice. This example uses Vim:
sudo vim /etc/systemd/system/consul.service2. Add the following content to the consul.service file:
[Unit]

Description=Consul

Documentation=https://www.consul.io/

[Service]

ExecStart=/usr/bin/consul agent -server -ui -data-dir=/temp/consul -bootstrap-expect=1 -node=vault -bind=10.0.2.15 -config-dir=/etc/consul.d/

ExecReload=/bin/kill -HUP $MAINPID

LimitNOFILE=65536

[Install]

WantedBy=multi-user.target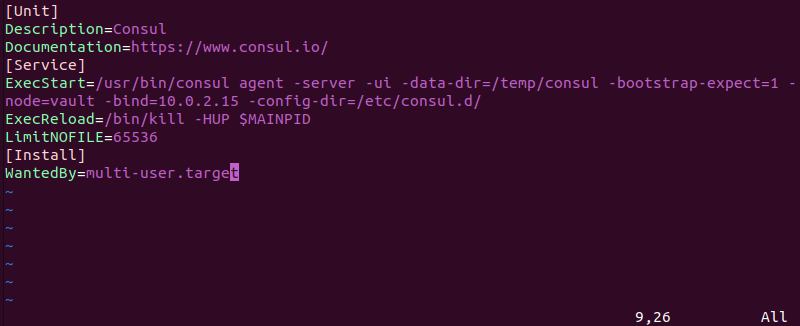
Note: In the ExecStart line, the -bind option should include your IP address. Make sure to add it.
The consul.service file content specifies its configuration and behavior and ensures it is automatically started during system boot. It includes:
- [Unit]. Provides metadata about the unit, including a description and documentation link.
- Description=Consul. Describes the service's purpose, which in this case is Consul.
- Documentation=https://www.consul.io/. Provides a link to the documentation for Consul.
- [Service]. Defines how the service is to be executed.
- ExecStart=/usr/bin/consul agent. Specifies the command to start the Consul agent.
- ExecReload=/bin/kill -HUP $MAINPID. Defines the command to reload the service configuration without stopping it completely.
- LimitNOFILE=65536. Sets a limit on the number of open files the service has.
- [Install]. Specifies how the service is to be installed.
- WantedBy=multi-user.target. Indicates the service starts automatically when the system reaches the multi-user target, which is a basic system initialization level.
3. Save and exit the file.
4. Create a configuration directory
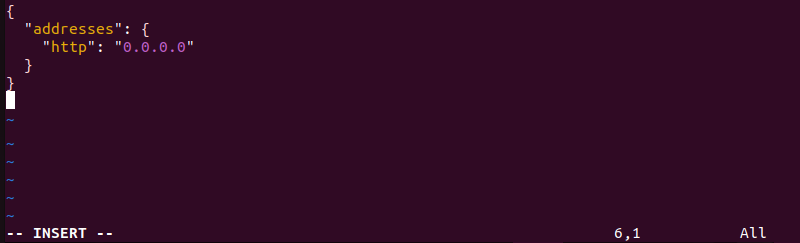
sudo mkdir /etc/consul.d5. The UI configuration file (ui.json) is used to customize various aspects of Consul's user interface, such as enabling or disabling specific features, defining ACL settings, configuring UI themes, etc.
Create a new .json file in the directory:
sudo vim /etc/consul.d/ui.json5. Set up the Consul UI to listen on all available network interfaces (0.0.0.0) for HTTP connections by adding the following to the newly created file:
{

"addresses": {

"http": "0.0.0.0"

}

}
6. Save and exit the file.
7. Reload the system for the changes to take effect:
systemctl daemon-reloadThe command has no output.
8. Start the service with:
systemctl start consul9. Enable Consul with:
systemctl enable consul
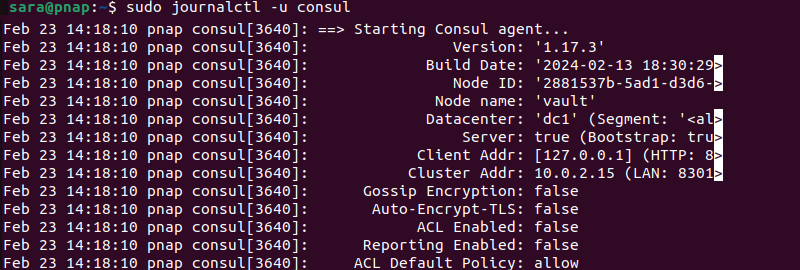
10. Verify the service is up and running with the journalctl command:
sudo journalctl -u consul
11. Open a web browser and navigate to the URL:
http://localhost:8500/ui

This opens HashiCorp's online management platform and displays available services. If Consul is listed as a service, you have successfully set up the software.
Step 3: Installing Vault on Ubuntu
With Consul in place, install Vault on the Ubuntu system.
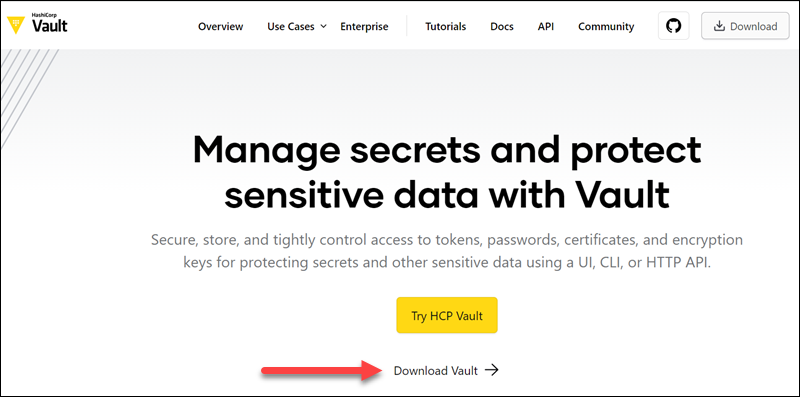
1. Go to Vault's official website and click Download.
2. Scroll down to the Linux section.
3. Find the Binary download subsection.
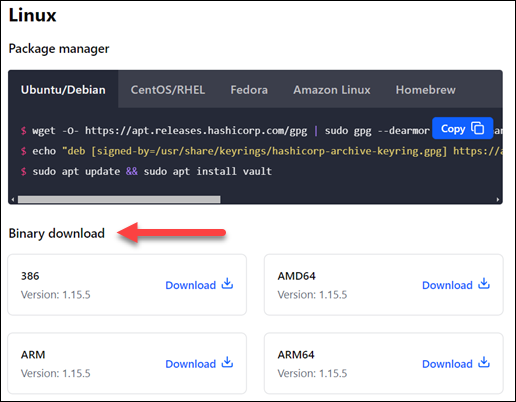
4. Choose the download compatible with the system architecture. In this example, it is AMD64.
2. Right-click the Download button and note the link location.
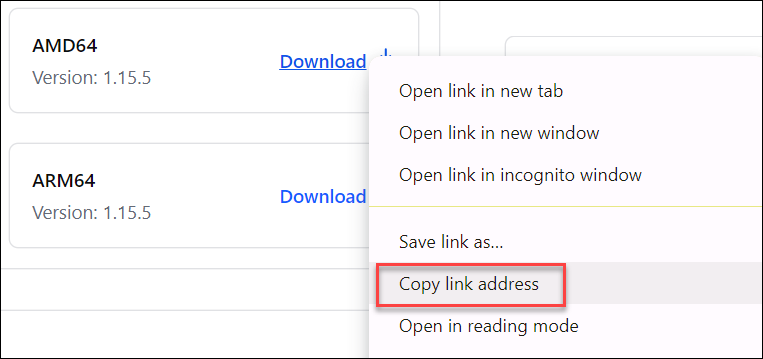
5. Using the wget command, download the package by pasting the link location copied in the previous step:
wget https://releases.hashicorp.com/vault/1.15.5/vault_1.15.5_linux_amd64.zip
4. Unzip the package using the following command:
unzip vault_1.15.5_linux_amd64.zip
5. Move the package to the /usr/bin directory:
sudo mv vault /usr/binThe command has no output
6. Check the installation using the following command:
vault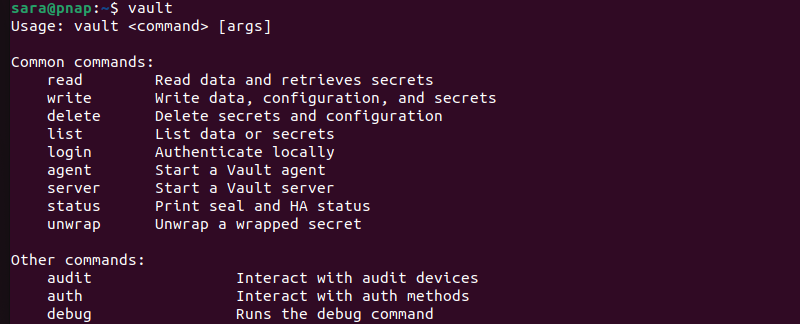
The output shows all available vault commands.
Step 4: Configure Vault
In binary Vault installation, configuring Vault is crucial because it allows users to set up Vault's behavior. Proper configuration ensures Vault operates securely and according to the user's specific requirements. Take the following steps to configure Vault:
1. Create a configuration directory
sudo mkdir /etc/vaultThe command has no output.
2. Vault's configuration file, config.hcl, is written in HCL (HashiCorp Configuration Language). With a simpler syntax than JSON or YAML, HCL enhances flexibility and readability, which is particularly useful for specifying policies, authentication methods, secret engines, and other advanced settings in Vault.
Make a configuration file within the directory using a text editor. For instance, to create it with Vim, run:
sudo vim /etc/vault/config.hcl3. Type or paste the following content into the file:
storage "consul" {
  address = "127.0.0.1:8500"
  path    = "vault/"
}

listener "tcp" {
  address     = "IP.ADDRESS.OF.SERVER:8200" # or "0.0.0.0:8200" to listen to everything
  tls_disable = 1
}

ui = true
For example:
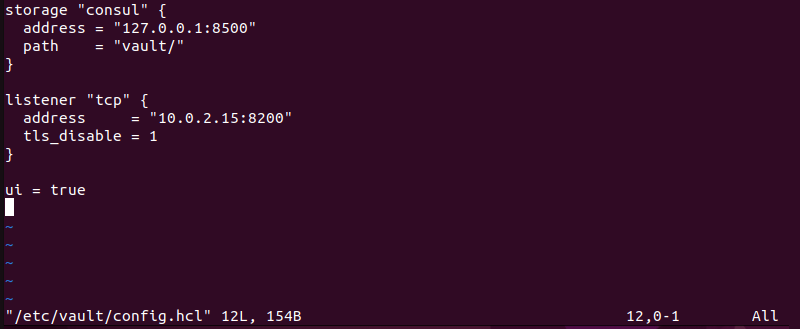
The configuration file consists of:
storage "consul". Specifies that Vault uses Consul as its storage backend. It provides the Consul server address (127.0.0.1:8500) and the path where Vault's data is to be stored ("vault/").listener "tcp". Defines how Vault listens for incoming connections. It specifies the address and port (IP.ADDRESS.OF.SERVER:8200) where Vault should listen to client requests.tls_disable=1.Indicates TLS (Transport Layer Security),ui = true. Enables the Vault Web UI, allowing users to interact with Vault using a graphical interface.
Note: Make sure to replace "IP.ADDRESS.OF.SERVER" with the actual IP address of your server or "0.0.0.0" if you want to listen to all available interfaces.
4. Save and exit the file.
5. Create a UNI (.uni) file. Vault typically uses HCL for more complex configurations and UNI for simpler, more straightforward configurations. To make a .uni file in Vim, execute:
sudo vim /etc/systemd/system/vault.service6. Make sure the file content matches the one below:
[Unit]
Description=Vault
Documentation=https://www.vault.io/

[Service]
ExecStart=/usr/bin/vault server -config=/etc/vault/config.hcl
ExecReload=/bin/kill -HUP $MAINPID
LimitNOFILE=65536
Restart=on-failure
RestartSec=5s

[Install]
WantedBy=multi-user.target
The configuration file is similar to the consul.service configuration file and consists of:
[Unit]. Shows metadata about the unit.Description. Explains the unit purpose, which is running Vault.Documentation. Establishes a link to additional documentation for Vault.[Service]. Specifies how the service is to be executed and managed.ExecStart. Determines the command to start the Vault server, including the path to the Vault binary and the configuration file location.ExecReload. Defines the command to reload the service configuration without interrupting service.LimitNOFILE. Sets the maximum number of open file descriptors the Vault process is allowed to use.Restart. Specifies the conditions under which the service is to be restarted.RestartSec. Sets the time to wait before restarting the service.[Install]. Configures installation-related properties.WantedBy.Specifies the target the service should start under. In this case, it'smulti-user.target, which means Vault starts when the system enters the multi-user mode.
7. Save and exit the file.
8. Confirm the changes with:
systemctl daemon-reload9. Start vault with:
systemctl start vault10. Enable vault with:
systemctl enable vault
11. Verify the vault status with:
systemctl status vault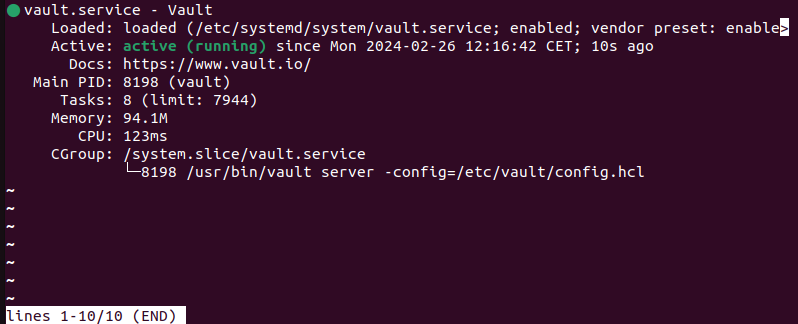
The status shows the service is active (running).
12. Using a vault client, connect to the running service with the command:
export VAULT_ADDR=http://[IP.ADDRESS.OF.VAULT]:[PORT.NUMBER]The IP.ADDRESS.OF.VAULT is to be replaced with the actual IP address and the appropriate port number.
In this example, the command is:
export VAULT_ADDR=http://10.0.2.15:8200The command has no output.
Step 5: Initialize Vault
As you have already installed Consul to serve as the back-end storage, initialize Vault manually for it to work correctly. Take the following steps:
1. Run the following command to see the current Vault status:
vault status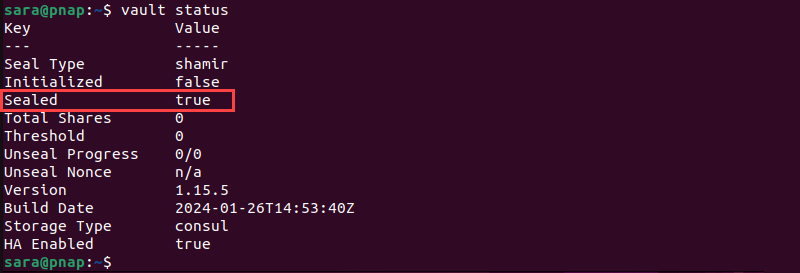
As in the image above, the output displays Vault is sealed and not initialized yet.
2. To change Vault's status, users need three keys. Find them by running the command:
vault operator init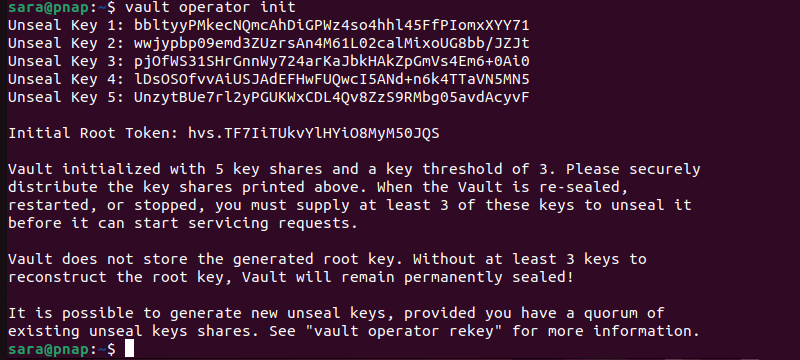
The terminal returns five Unseal Keys as well as the Initial Root Token. Moreover, it explains that users need to supply at least three keys when the Vault package is resealed, restarted, or stopped. Otherwise, Vault remains sealed. Therefore, copy all five keys and paste them into a separate file.
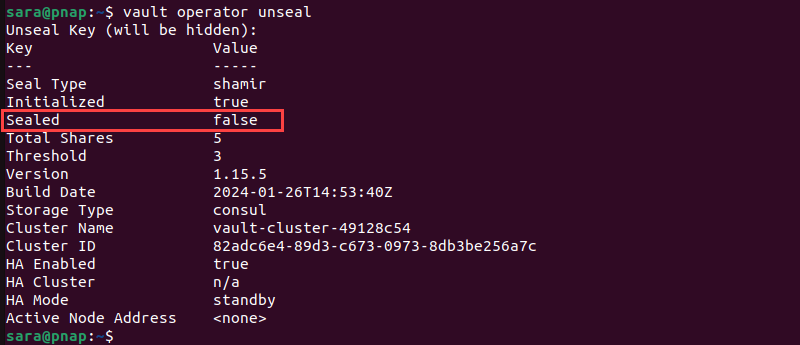
3. Run the command:
vault operator unseal
4. Copy and paste the first key and hit Enter.
5. Repeat the command three times using the three keys. After the last one, the vault Sealed status changes to false.
6. The last step to unseal Vault is to run the following command with the Initial Root Token (listed with the Unseal Keys):
vault login [root_token]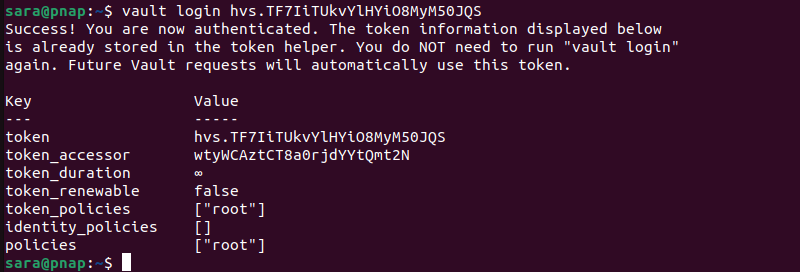
7. Now, check the status again to verify the software has been initialized:
vault status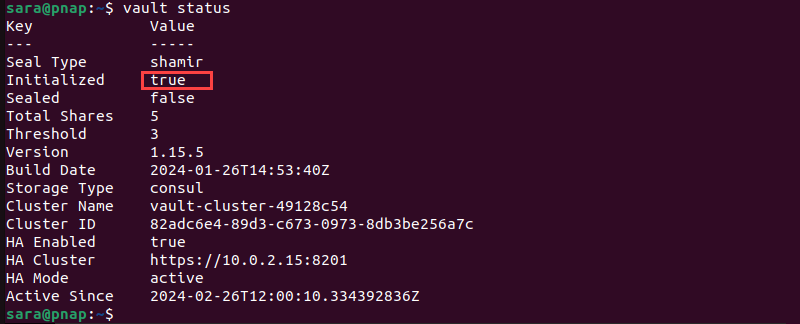
Conclusion
After reading this article, you know how to install Vault on Ubuntu using three different methods.
Next, protect your machine by learning about Linux security stats, tools, and best practices.
